I started these a couple of years ago but it's just recently I've been able to finish them off. I invested in a potting shed last month, this is now my studio/working space, when the sun is out it's possible to get a couple of hours work in.
Monday, 5 November 2012
Monday, 1 October 2012
Tuesday, 8 May 2012
How to Make a stamp for Face Painting designs
Materials required - Thin foam, thick foam/polystyrene, pencil, pen, surgical knife, Pritt Stick, Scissors
Step one – Print image, make sure it’s the exact size you want, it’s easy to make it too big. Draw round the edges with pencil. If you’re doing writing or an image that needs to face left of right, remember to use trace the right way round.
Step one – Print image, make sure it’s the exact size you want, it’s easy to make it too big. Draw round the edges with pencil. If you’re doing writing or an image that needs to face left of right, remember to use trace the right way round.
Step Two – Cut a piece of thin foam (try to use a light coloured piece so the lead shows up) to the approximate size,
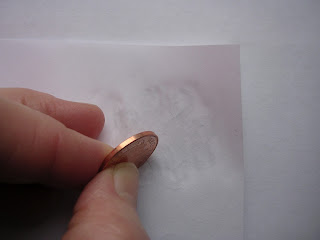
rub the outlined image onto the foam,. These thin foam sheets can be bought in
packets from the £1 shop or most places that sell craft materials.
Step Three – Trim the outlined image as close to the edges
as possible, don’t cut anything else at this stage, as it’s too fiddly. Then using a good quality Pritt Stick (I’ve
been using Power Pritt Stick) stick onto either a foam or polystyrene block/'base' (something that's easily cut/trimmed),
the foam backing from pizzas etc is quite good for this, you might need to
double the 'base' thickness as it's easier to manage when applying the paint.
Step Four – You can leave for a couple of hours to allow the
glue to dry or overnight.
Step Five – Draw round the pencil image again with pen to
define the line.
Step Six – With a surgical knife (these can be bought from
most craft shops, remember to buy lots of blades) carefully cut the remaining
areas away, always make sure your fingers are never in the way and never let
children use one of these knives or leave them lying around.
Step Seven – Trim the edges of base foam or polystyrene, in this example I used a funny kind of foam but it's best to use the polystyrene sheets that come with pizzas etc I mentioned earlier.
Your stamp should now be ready to use, I apply the paint to
the stamp using a sponge, you’ll need to practice the consistency of paint
required to achieve a good solid image, DFX and Wolfe paint work very well. With careful use the stamps should last a very long time. I'll try to post some images of designs done using stamps in the future.
I hope you find this useful.
Mary x
Wednesday, 28 March 2012
Tuesday, 27 March 2012
Tuesday, 13 March 2012
Colouredin
Image size - 40cm x 27cm, Medium - Acrylic on Paper, Price - £50.00 unframed
maryfairgrieve@hotmail.com
maryfairgrieve@hotmail.com
Tuesday, 6 March 2012
Still life, Egg and Peppers
The Egg - pastels, unframed price - £35.00 includes mounting card, overall size - 37cm x 30cm approx
Peppers - pastels, unframed price - £35.00 includes mounting card, overall size - 39cm x 31cm approx
maryfairgrieve@hotmail.com
maryfairgrieve@hotmail.com
Still life Apple Core, Banana, Amethyst
Amethyst - pastels, unframed price - £35.00 includes mounting card, overall size - 40cm x 31cm approx
Banana - pastels, unframed price - £35.00 includes mounting card, overall size - 37cm x 30cm approx
Apple Core - pastels, mounted and framed by Joe at Foursticks Framing- £65.00, size - 36cm x 30cm - The Apple Core is now sold.
maryfairgrieve@hotmail.com
Subscribe to:
Comments (Atom)


